- Quick Start
- Test Monitoring
- LM GitHub App
- LM Dashboard
- REST API
- FAQ
- Using the API via CLI
- Administration Guide
- Workflow Testing RO-crate specification
- Index
The LifeMonitor GitHub app
LifeMonitor supports the application of workflow sustainability best practices. Much of this revolves around following community-accepted conventions for your specific workflow type and implementing periodic workflow testing. Following conventions allows existing computational tools to understand your workflow and its metadata. On the other hand, periodic workflow testing ensures that problems that can arise over time due to software collapse are detected and interested people notified: for workflow authors, it gives them the opportunity to fix the workflow and keep it useful; for potential workflow re-users, it reassures them that the workflow works and is maintained.
LifeMonitor mainly supports the application of repository best practices through its GitHub app, while the LifeMonitor service supports periodic workflow testing.
Supported repositories
To use the GitHub app, your workflow must be hosted in a GitHub repository; on the other hand, the test monitoring functionality can be used with any compatible testing service accessible from the LifeMonitor server. Supported best-practice repository layouts include:
The LifeMonitor GitHub App
The LifeMonitor GitHub app does the following things.
- Examines the repositories on which it is installed and applies a series of checks.
- Suggests pull requests to make changes or additions to bring the workflow repository closer to conforming to best practices.
- Opens issues to let you know about problems detected by the checks:
- you can interact with the LifeMonitor bot through the issues, to provide information or issue commands.
- Registers new releases/versions of the workflow with both the LifeMonitor service and the WorkflowHub workflow registry.
The default settings for these actions can enabled or disabled through the app configuration (see below).
Exactly which checks are applied depends on the type of workflow you have and can change in time as the development of LifeMonitor moves forward.
Installation
- Navigate to the LifeMonitor GitHub app management page.
- Click the Install button;
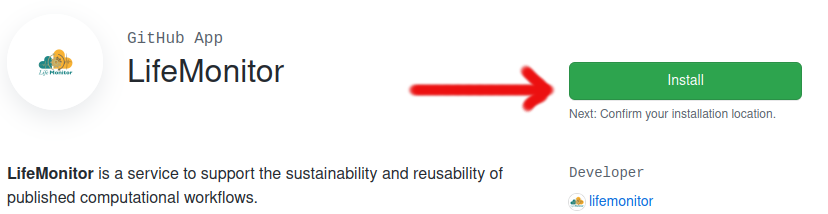
- Pick the repository where you want to install the app.
- Pick the account or organization that owns the repository;
- Select one or more repositories using the form, the click Install & authorize.
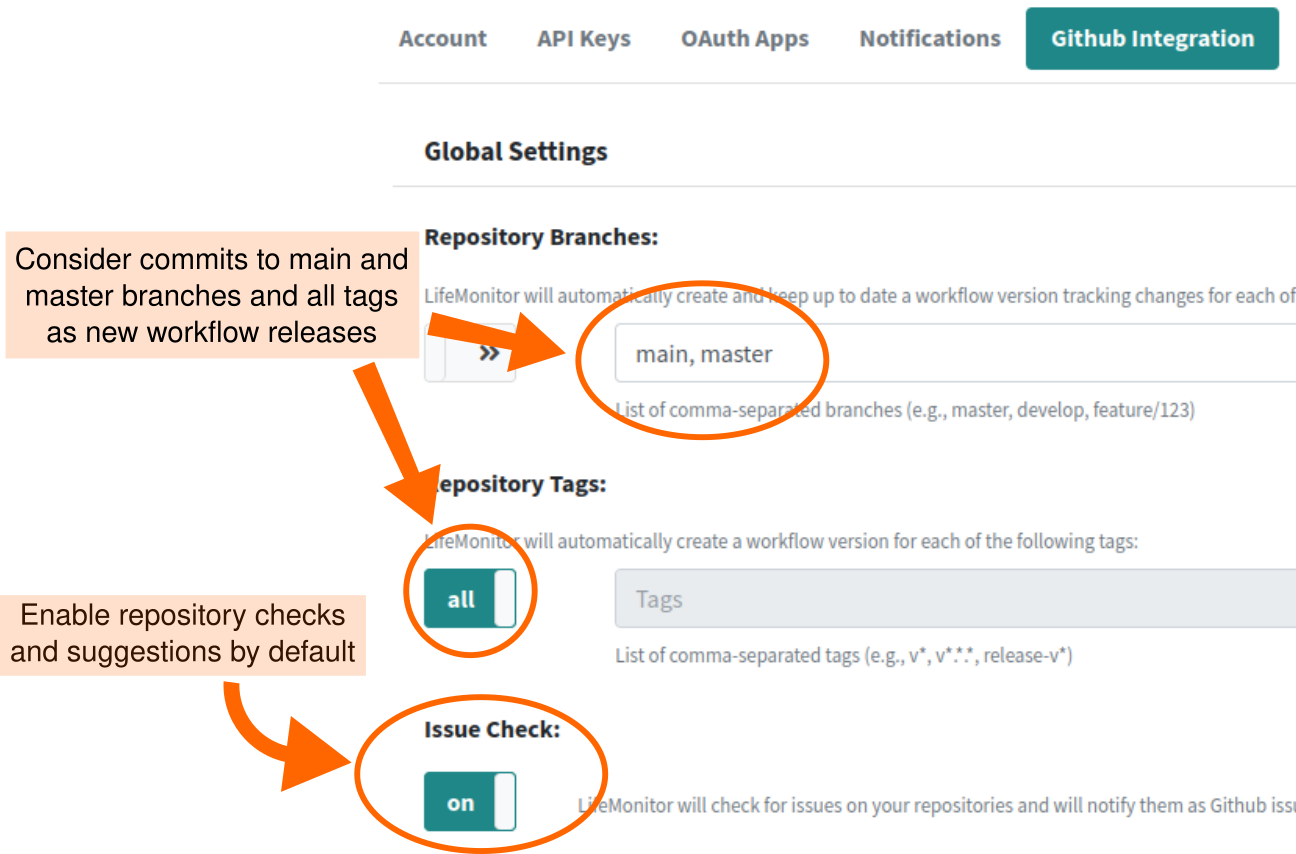
- If it’s the first time you install the app, the process will take you to the
LifeMonitor web site to configure the GitHub integration settings (see image
below).
- To fully enable the GitHub app, make sure “Issue Checks” are enabled.
- Set the default branches and tags that the app should consider as “new releases”.
- All the global settings can be overridden in the repository-specific configuration file.
- Recommended settings:
- [Optional] Enable automatic upload to the WorkflowHub
registry.
- Turn on registry integration in the configuration page.
- If necessary, LifeMonitor will guide you through the process to connect your WorkflowHub account to your LifeMonitor account.
- The LM app will then upload your new workflow releases automatically.
- The settings from step 4 will be used to identify new releases.
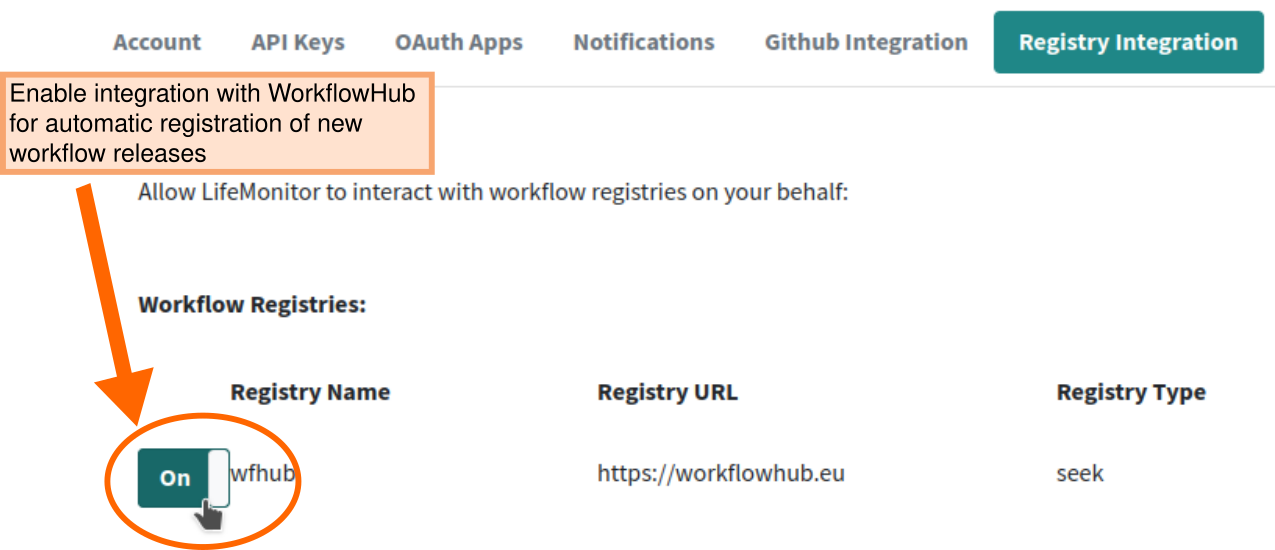
- Turn on registry integration in the configuration page.
Configuration File
In addition to the global GitHub integration
settings, the
LifeMonitor GitHub app looks for a configuration file called lifemonitor.yaml
at the base of the repository. In that file you can customize the behaviour of
the bot for the specific repository; settings in the file override
the global settings in the LifeMonitor web app.
You can see a full example configuration file here: lifemonitor.yaml.
The full schema for the file format is here: lifemonitor.yaml schema.
Configuration keys
Base configuration settings:
| Property | Description | Type | Default |
|---|---|---|---|
| name: | Name of the workflow to be shown in LifeMonitor | string | Name in RO-Crate; repository name |
| public: | Workflow visibility. Public workflows and their tests status can be seen by everyone on the LifeMonitor web site | boolean | ? |
| issues.check: | Enable repository checks | boolean | set in global settings |
| issues.include: | Validations to activate | array of strings | all validations |
| issues.exclude: | Validations to deactivate | array of strings | empty |
Branches and tags to be monitored for new workflow
versions are specified through the push.branches and push.tags properties.
Each of these takes an array of objects with the following properties.
name: Glob pattern matching a branch or tag name.update_registries: Array of names of registries to update when a new workflow version is available. Recognized registries are listed at the endpoint https://api.lifemonitor.eu/registries.enable_notifications:lifemonitor_instance: Which LifeMonitor instance to notify (default: “production”; can be set to “development”).
By default, the main branch is monitored.
Here is an example:
push:
  branches:
    - name: "main"
      update_registries: []
      enable_notifications: true
  tags:
    - name: "v*.*.*"
      update_registries: ["wfhub"]
      enable_notifications: true
Validating your configuration
Before committing your configuration file, you can validate it by uploading it to the LifeMonitor configuration validation service.
Example configuration
Here’s an example configuration for a workflow that is:
- publicly visible on LifeMonitor;
- where releases are marked as git tags with names like
v1.0.0; - and new releases are registered with both WorkflowHub and LifeMonitor.
public: True

issues:
  check: true

push:
  tags:
    - name: "v*.*.*"
      update_registries: [wfhub]
      enable_notifications: true
Checks/validations
You can see the list of validations active in LifeMonitor at https://api.lifemonitor.eu/workflows/issues.html.